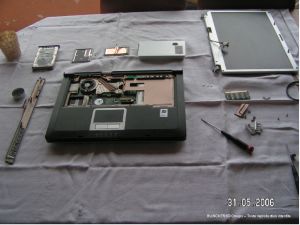
III - Disassembling
0 - Shrinking of the screws of maintenance
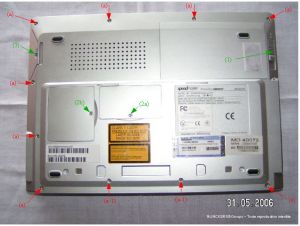
To unscrew all the screws (A).
To turn over the portable to dislodge them.
!! the screws (a-1) retain the control
cluster and have evil to leave, they can remain in place while waiting!!
All the screws (A) and (a-1)
are identical, and can be mixed.
1 - Shrinking of the battery.
To push the slide at bottom to the bottom (on the right in top on
the photograph) (1).
To raise the battery on the with dimensions right.
To withdraw the battery.
2 - Shrinking of the screws of mask and the masks.
has) To withdraw the screws of the mask “addition of
memory†(flche green with the top of the yellow label) (2a).
To withdraw the mask by raising it.
b) To withdraw the screws of the mask of extention NCV
(flêche green on the left in the medium) (2b).
To withdraw the mask by raising it.
3 - Withdrawal of the hard disk
To withdraw the screw of maintenance of the hard disk
(flêche green in top on the left)(3).
To firmly push the mask towards the left (!! without forcing to the
bottom or top!!).
- The withdrawal is asser difficult, in the direction where
it is necessary to extremely push asser on the mask.
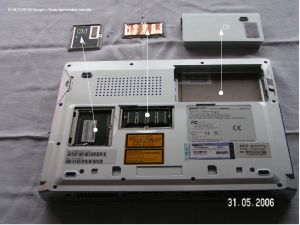
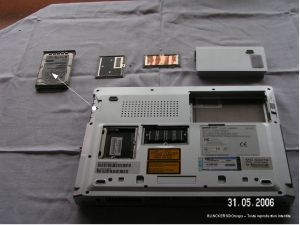
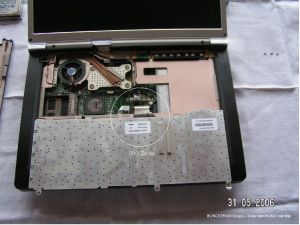
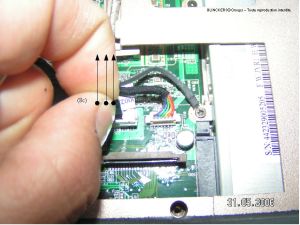
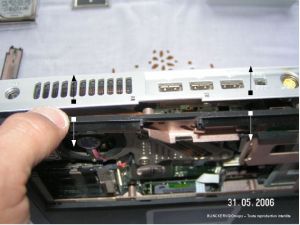
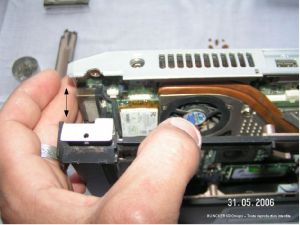
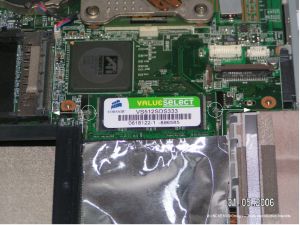
4 - Withdrawal of the barette external memory (so present)

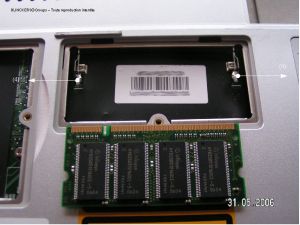
To draw towards outside the two legs metalic (see
flêches on the second photograph) (4).
If the operation is correctly carried out, the memory board, must be
raised all alone (see photo).
To withdraw the memory board while drawing towards is.
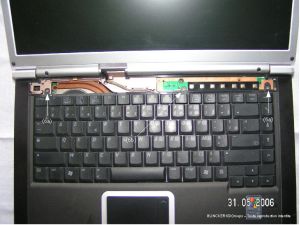
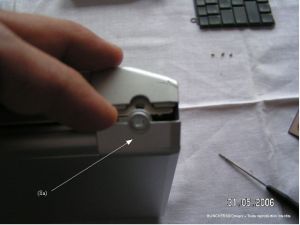
5 - Shrinking of the keyboard Shortcut keys
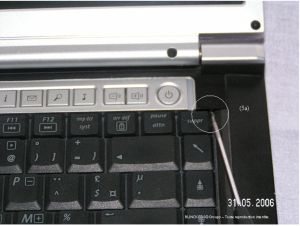
To insert a small flat screwdriver on the right of the button of
startup. (5a)
To exert a pressure to the bottom (on the level of the handle) by
making a movement of lever on the level of the button of startup. (5a)
!! Attention at the time of the pressure exerted not to break the
key “Suppr†(5a)!!
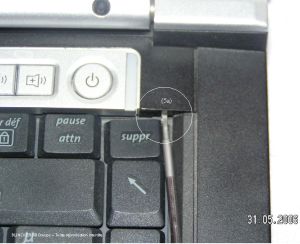
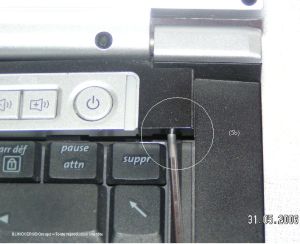
Clips maintenance the keyboard “Touches of short cutâ€.
Y outward journey gently. (5b)
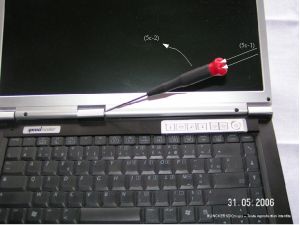
To insert a small flat screwdriver in the central axis.
To exert a pressure on the screwdriver (5c-1) and to raise (5c-2).
To withdraw the keyboard delicately Shortcut keys and to deposit it.
6 - Shrinking of the keyboard
To unscrew the screws (6a) and (6b).
!! Attention the screw (6b) is one can longer than the screws (6a)!!
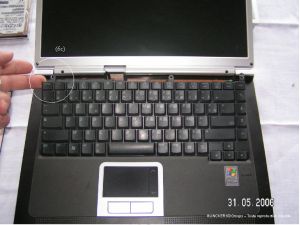
To raise the keyboard on the level of the support of screw of the
keyboard (on the right or on the left) (6c).
To gently draw the keyboard towards the screen.
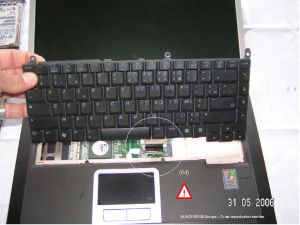
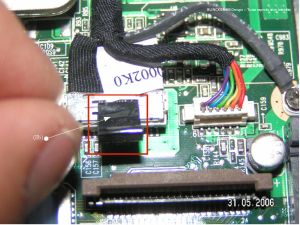
!! Caution: the keyboard is connected to the portable by a fragile
tablecloth trés (6d)!!
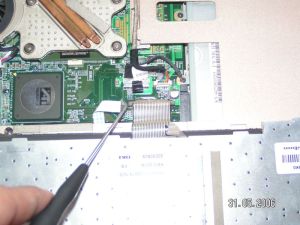
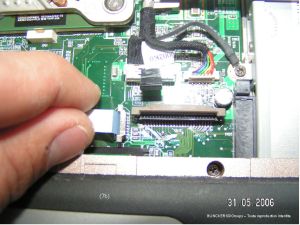
The tablecloth is maintained by a connector with vertical closing.
(6c)
To insert a small flat screwdriver (or a small grip) under the strip on
the left and to raise (see zoom).
To carry out the same operation on the line.
The tablecloth must leave all alone.
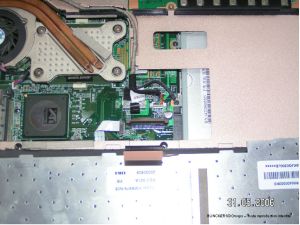
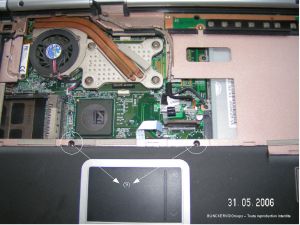
7 - Disconnection of TouchPad
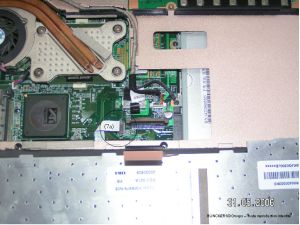
“To open†the connector on the same process as the
keyboard. (7a)
To disconnect the tablecloth. (7b)
!! Caution: the tablecloth is fragile!!
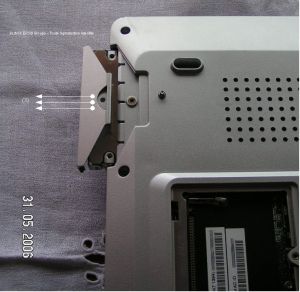
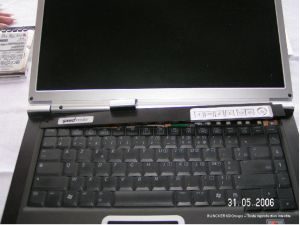
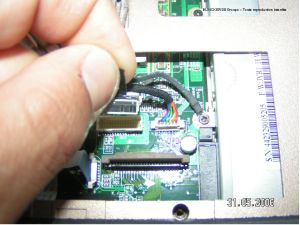
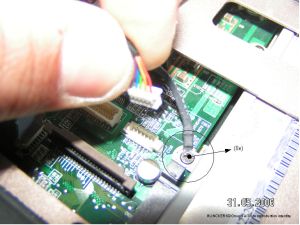
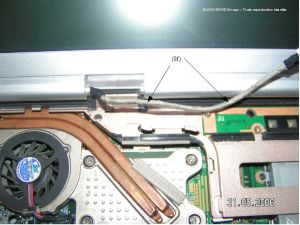
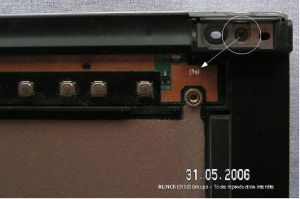
8 - Shrinking of the screen
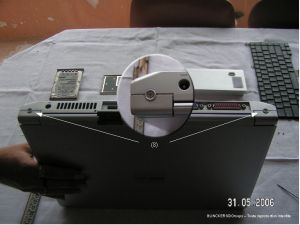
To unscrew the two screws on the level of the hinges of the screen on the back of the portable. (8)
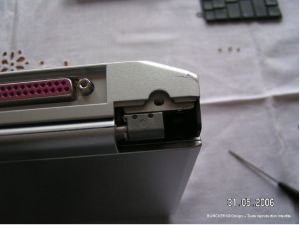
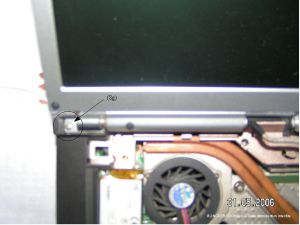
To raise the mask (with the hand) (8a) by drawing it towards is.
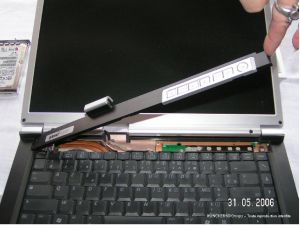
Photograph 2: sight of the hinge without its mask.
Disconnection of the screen
Not having technical documentation, I will name of left (8b)
towards the line the elements which relates to this stage:
- Connector âVGA of the flagstone. (8c)
- Connector of food of the flagstone. (8d)
- Mass. (8th)
Disconnection of card VGA
To seize the strip (8b) and to draw to the top (8c).
To release the card.
Disconnection of the food and the mass
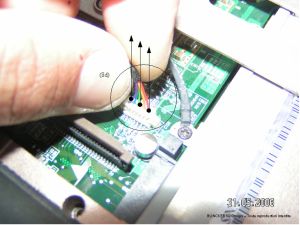
To seize all wire of the card (8d).
To draw to the top carefully.
To unscrew the screw beyond mass (8d)
To release the unit.
To release the plug wire of the screen (8f).
To withdraw the screw of maintenance of the hinge (8g) on the left, and
to make in the same way on the right.
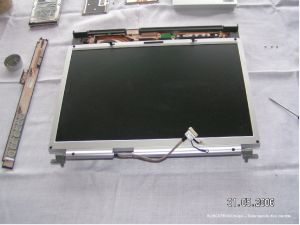
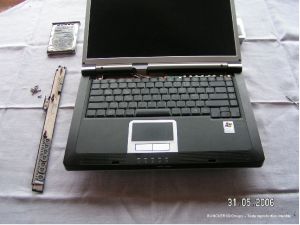
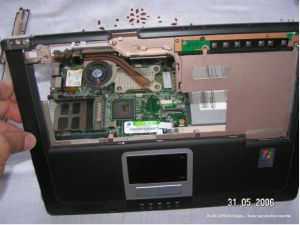
Dismounted screen and transition.
9 - Shrinking of the higher mask

To unscrew the screws (9).
To unscrew the screws (9a-0) and to withdraw the mask.
Foot-note: screws (8th), (9) and (9a-0) are identical, and can thus
be mixed.

To unscrew the screws (9a) on the left and on the right on the level of the hinges of the screen.
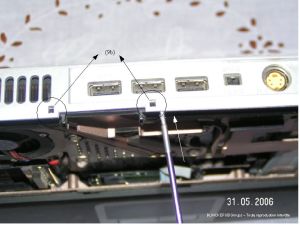
There are two pins on the level of catch USB and the exit of the
ventirad which “clips†the higher mask (9b).
To insert a small flat screwdriver enter the gray and black part and to
make lever in order to them clipser.
To draw aside the two parts.
To open the higher mask towards is.
10 - Withdrawal of the barette internal storage
To draw on the two legs metalic (see pictures).
If the operation is correctly carried out, the memory board, must be
raised all alone.
To withdraw the memory board.
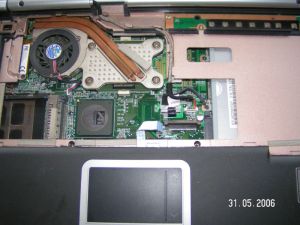
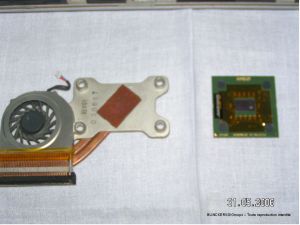
11 - Shrinking of the ventirad and the processor
Withdrawal of the fan
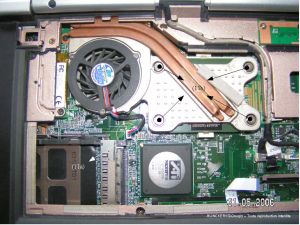
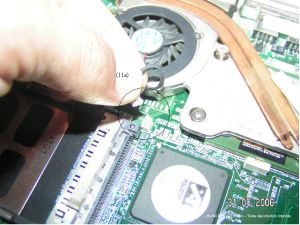
To locate on the photograph the connector of the fan (11a).
To seize on the level of wire (or the level of the card with a small
grip) and to hold firmly.
To draw upwards without acoups.
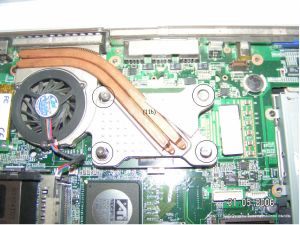
To unscrew the 4 screws (11b).
!! Attention the screws (11b) are with a spring. The spring is
between the head of the screw and the top of the fan. !!
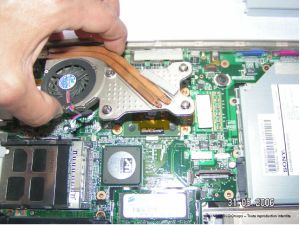
To raise the unit delicately.
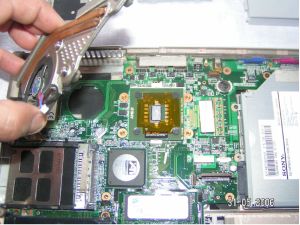
Shrinking of the processor
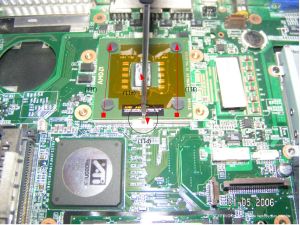
To insert a small flat screwdriver in the notch of the socket (11d).
To make an action leverage backwards (11th), in order to make slide the
socket backwards (11f).
!!
Attention this operation makes that the screwdriver takes appuit on the
bakelite of the processor (left green bleaches in the end (visible on
(11g)). Not to force!!
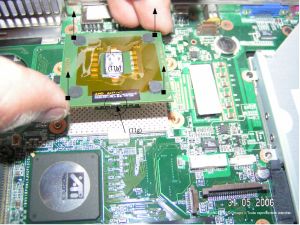
To raise the processor vertically (11h).
12 - Maintenance of the fan and the processor
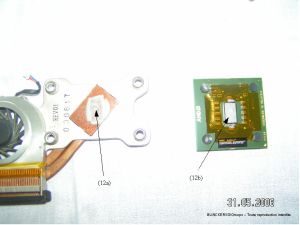
To clean the part coppered of the fan (12a) and the top of the
processor (12b) of the old thermal paste.
!!
Personal technique *: the first dry cleaning with toilet paper, then to
remove any trace of the old paste, I use toilet paper and acetone of
make-up removal.
To take guard not to put acetone on the zone
bakelite, plastic and electronic component!!
* It is a personal technique thus I will not be able to in no case to be held responsible for any deterioration of your material.
!! NOT TO SCRAPE THE FAN NOR THE PROCESSOR WITH ANY OBJECT METALIC!!
